
Log in to AWS console
To setup pg_cirrus on AWS EC2 Instances, you need to log in to AWS console. You may sign in as am IAM user or as root user.
Create Security Groups
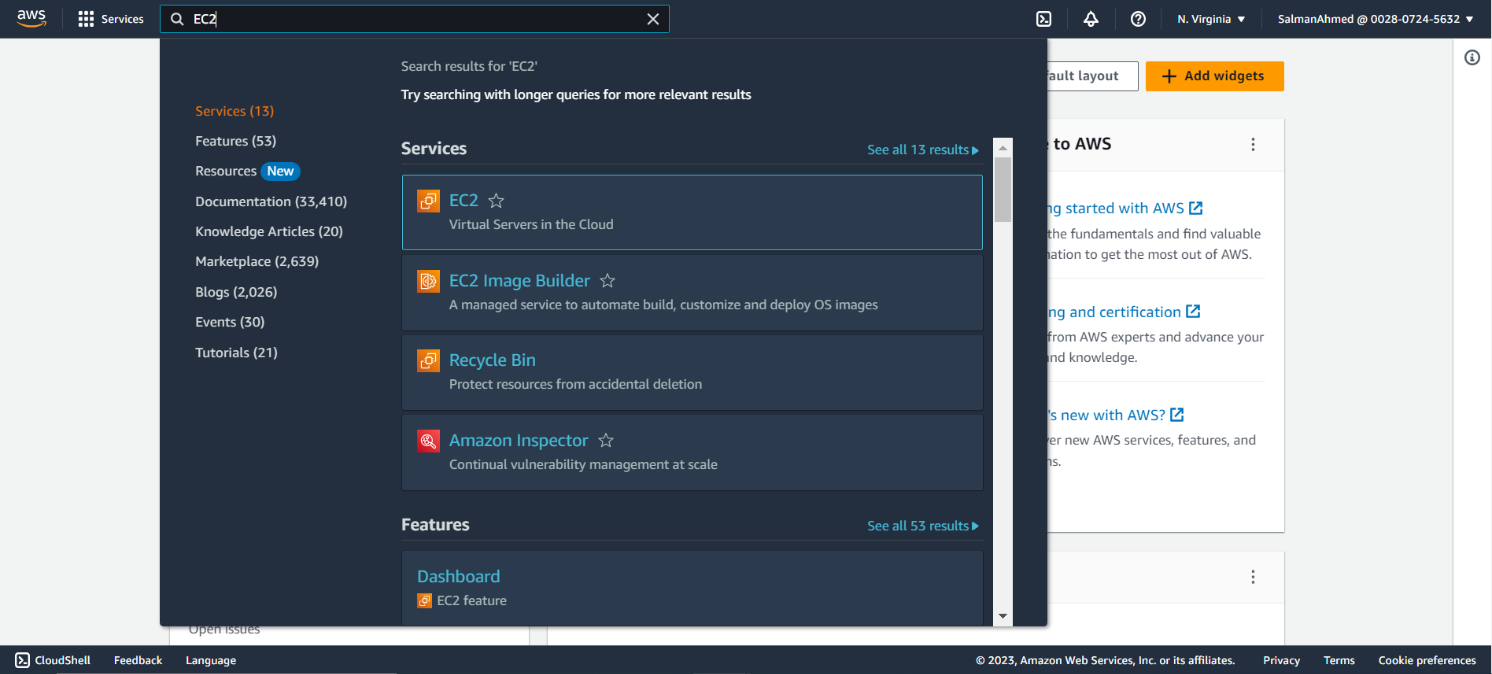
Security groups in AWS act as firewalls that control inbound and outbound traffic for your Amazon Elastic Compute Cloud (Amazon EC2) instances, as well as other AWS resources. To create security groups search EC2 in the search bar and under services click on EC2.
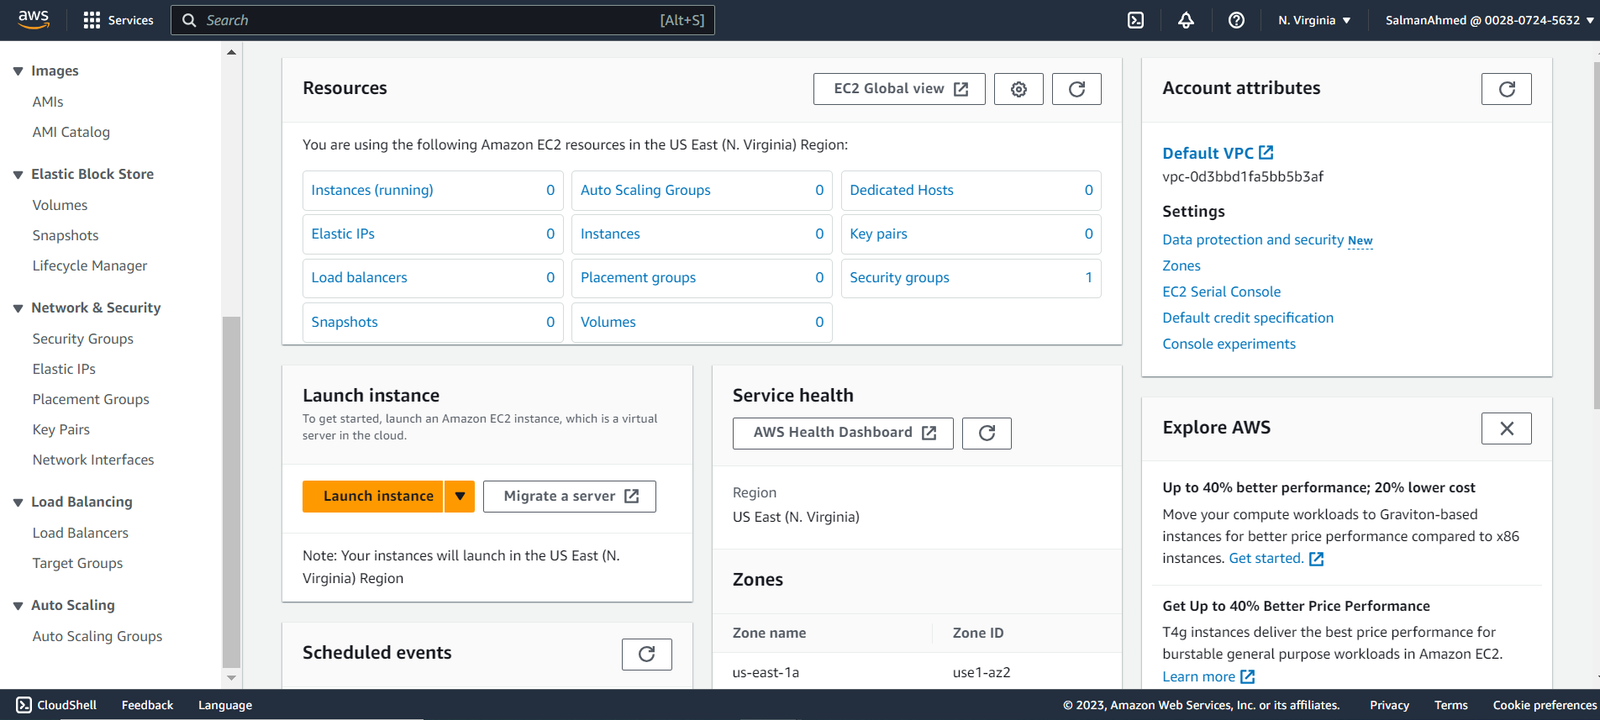
From the menu to the left side
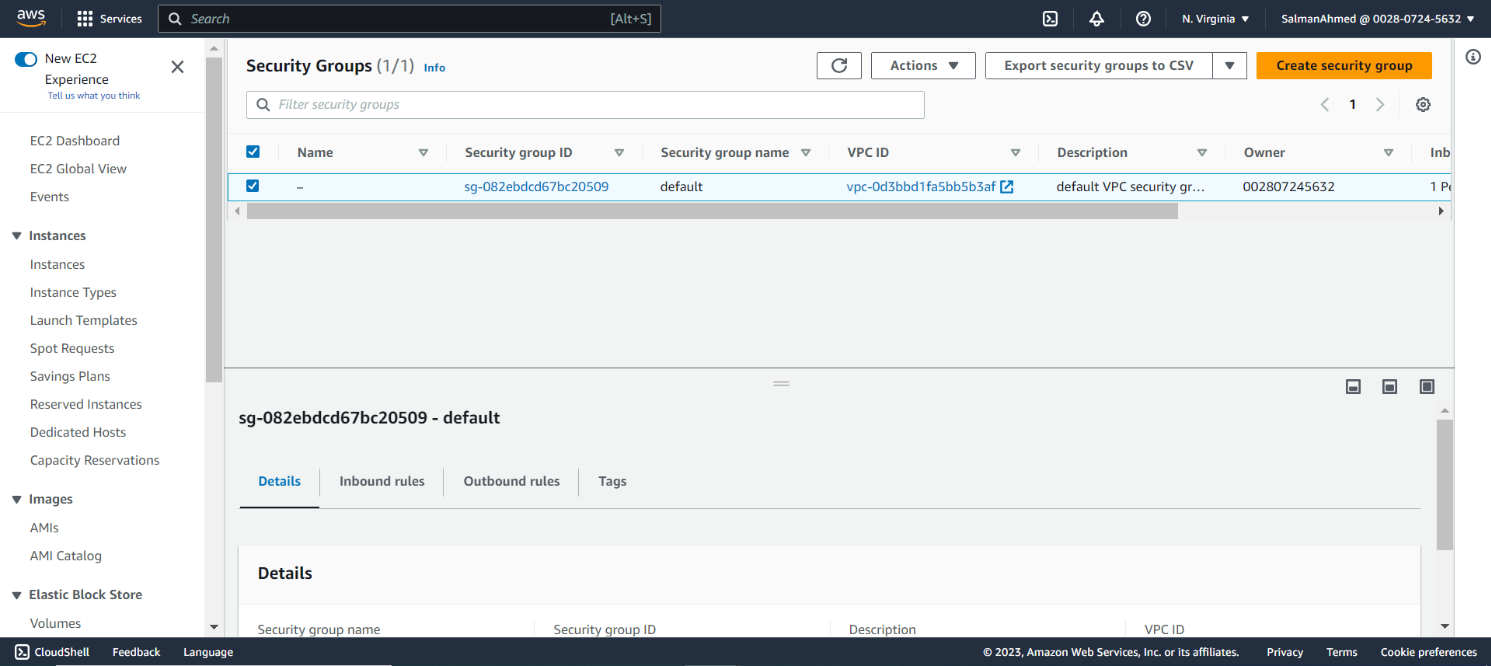
under Network & Security select Security Groups.
We need to create two security groups one for pgpool node and one for primary and standby nodes. In the security groups page click on Create security group.
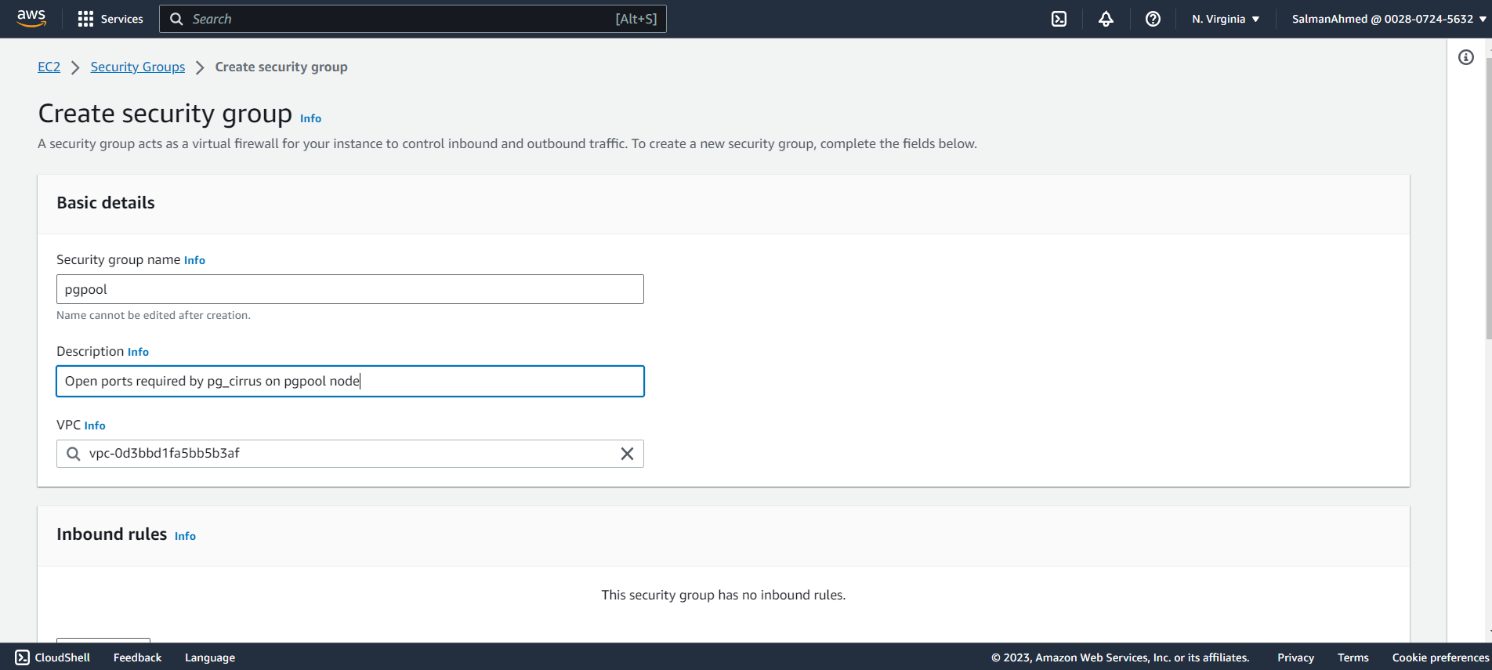
Create a security group for pgpool node
Create a security group for pgpool node and give it a name and description.
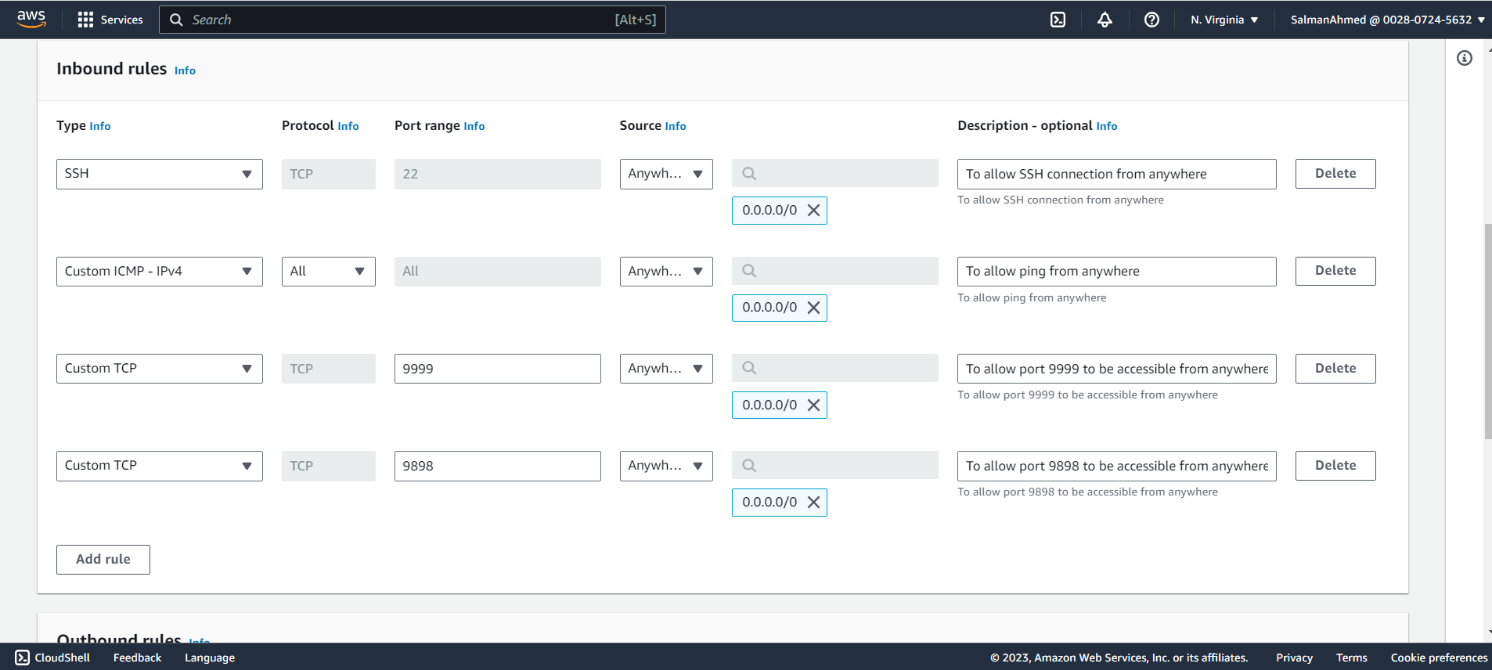
Add inbound rules
We need to add following inbound rules to our security group for pgpool node and select Create security Group from the bottom of the page.
Note: For simplicity we have allowed inbound traffic to all the required ports from anywhere. The source however can be further restricted.
Create a security group for primary and standby nodes
Go back to the security groups page and create another security group for primary and standby nodes. Give it a name and description.

Add inbound rules
We need to add following inbound rules to our security group for pgpool node and select Create security Group from the bottom of the page.
Note: For simplicity we have allowed inbound traffic to all the required ports from anywhere. The source however can be further restricted.
Launch Amazon EC2 Instances
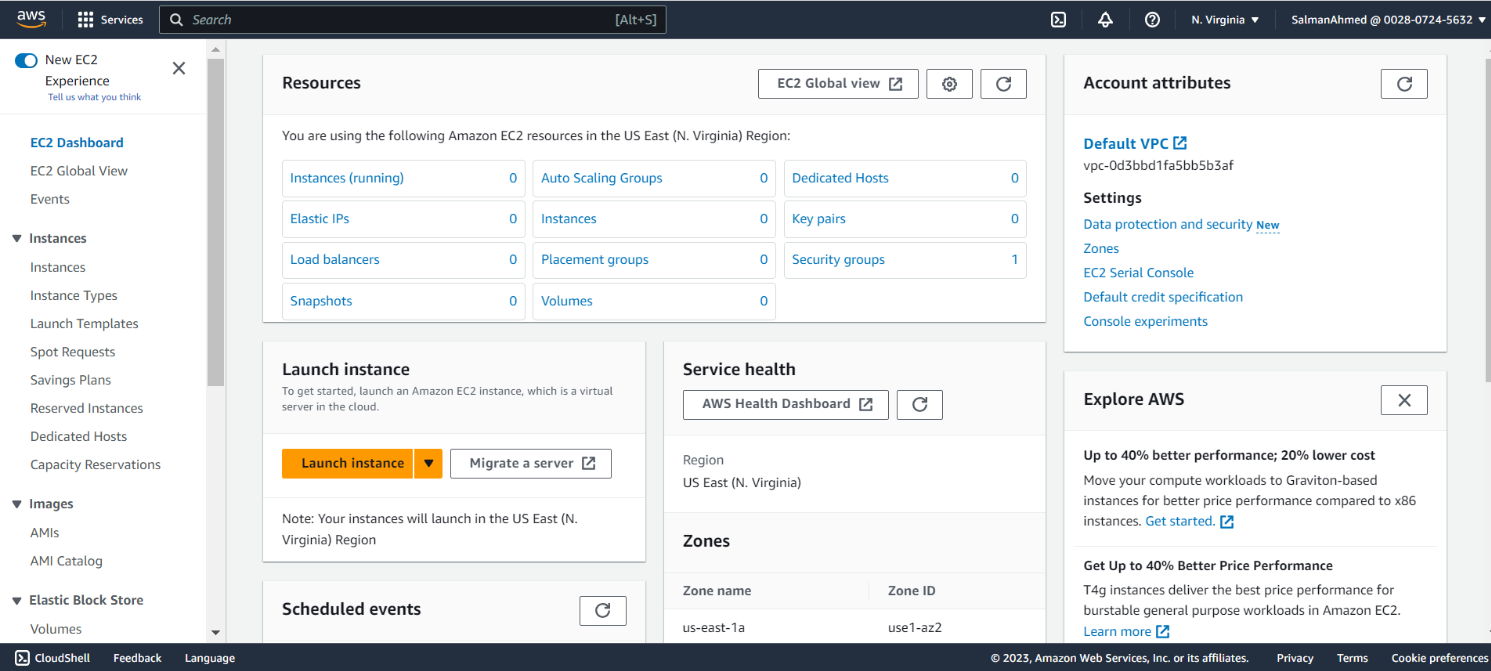
Select Instances under Instances from the menu on the left. On EC2 dashboard Click on Instances (running).
Launch instance for pgpool node
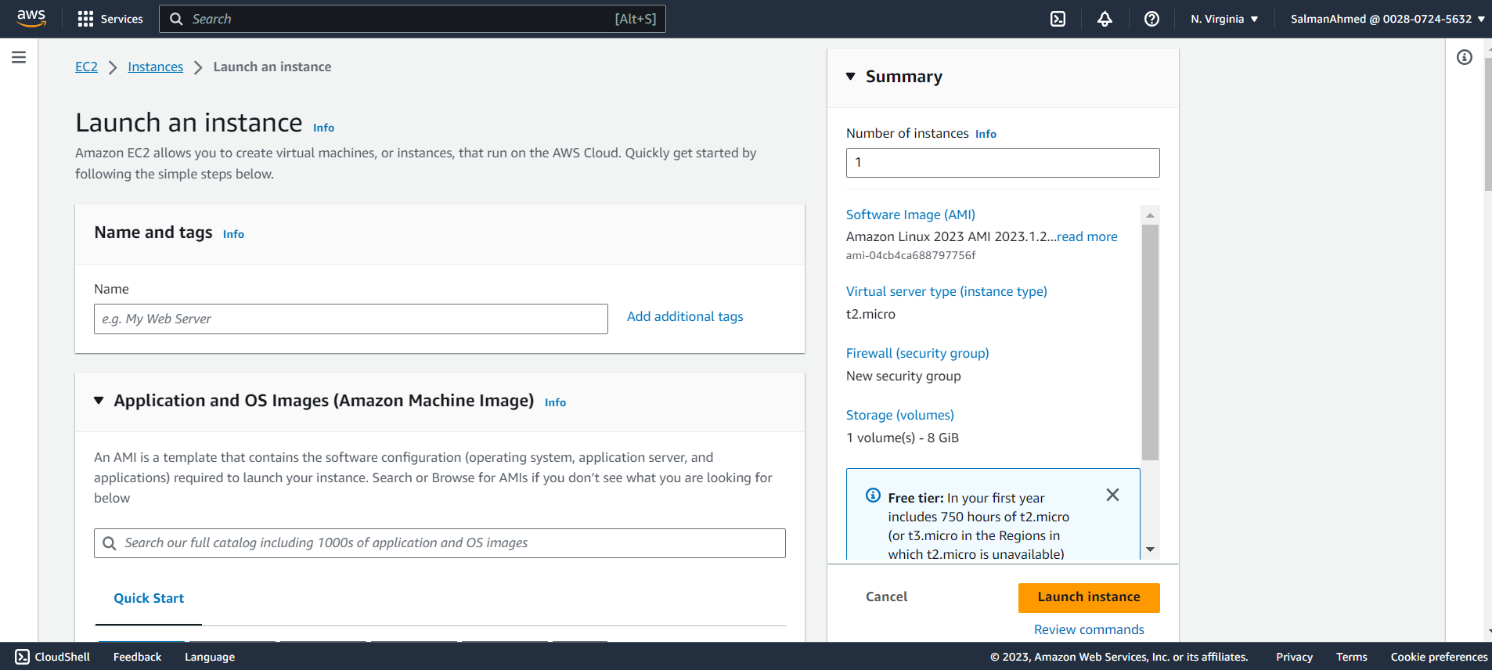
Click on Launch instances to launch an EC2 instance for pgpool node and you will be redirected to the following page. Keep the number of instances to 1.
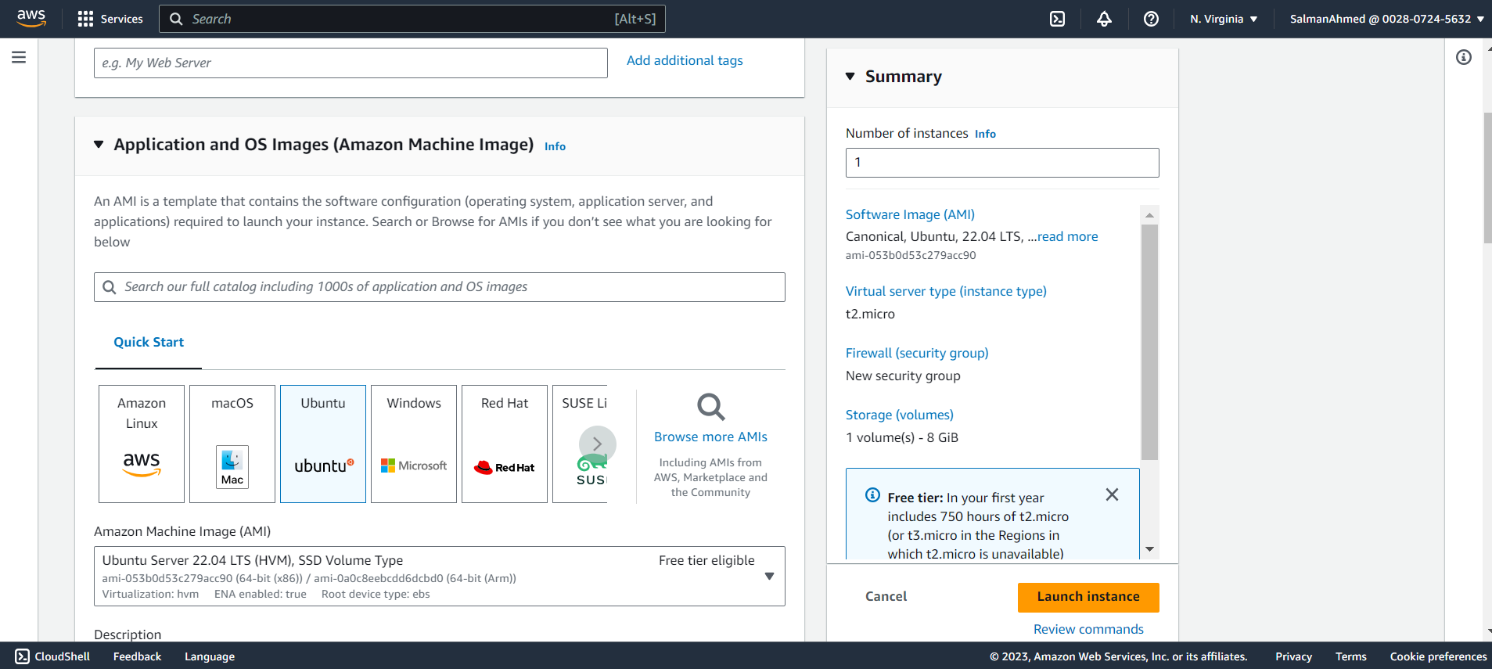
Select Ubuntu AMI
An Amazon Machine Image (AMI) is a supported and maintained image provided by AWS that provides the information required to launch an instance. Since pg_cirrus is currently only supported on Ubuntu, we will select Ubuntu AMI.
Set Instance Type
Select the instance type as per your requirement, for this blog we will be using t2.micro.
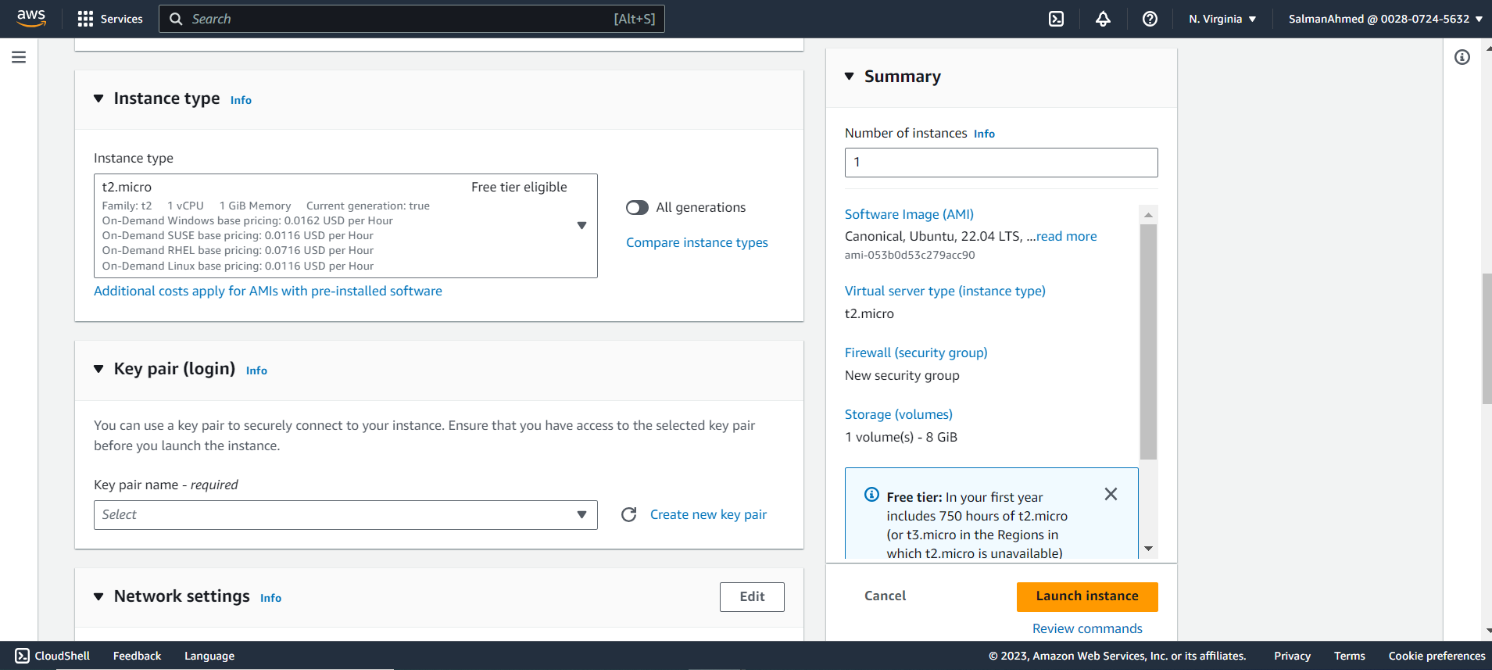
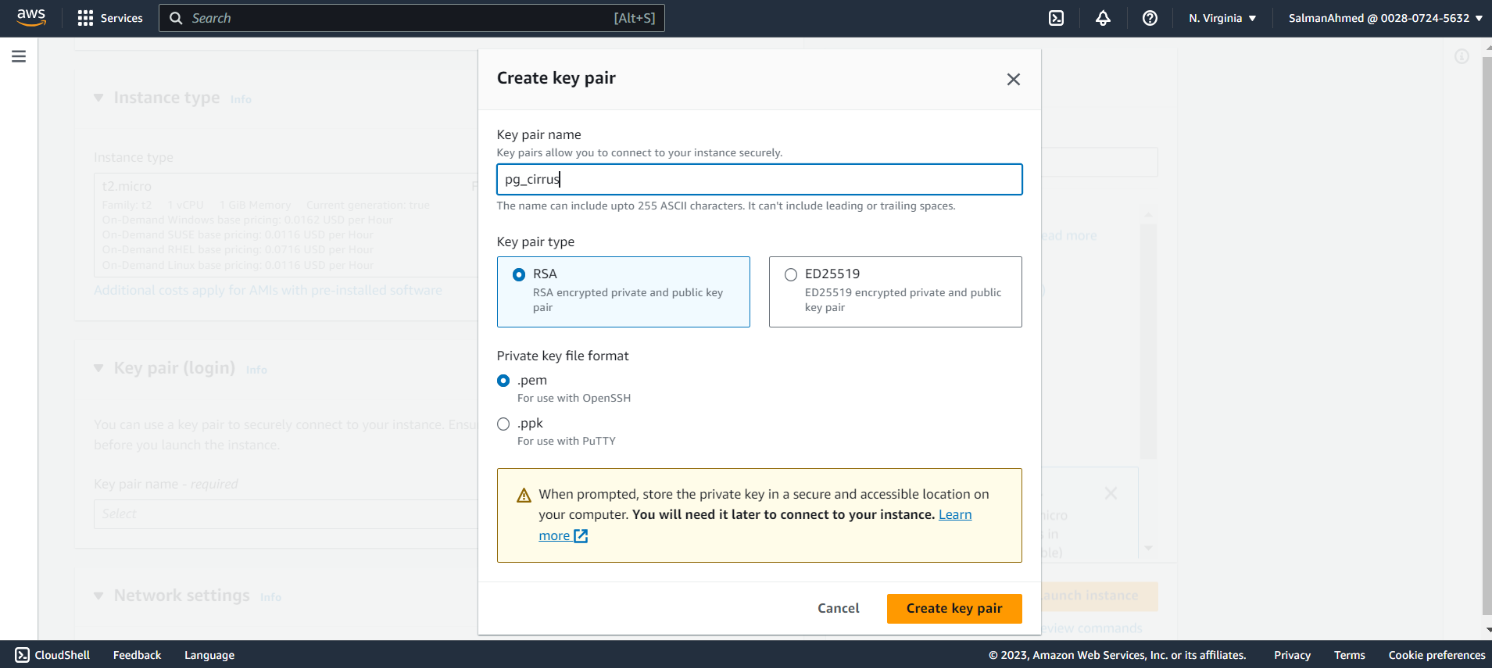
Create Key Pair
If you have an existing key pair you can use that, we’ll be creating a key pair named pg_cirrus by clicking on Create new key pair, the following menu will pop. Give the key pair a name, choose it’s type and private key file format. Click on Create key pair and key pair will be created and .pem file would be downloaded.
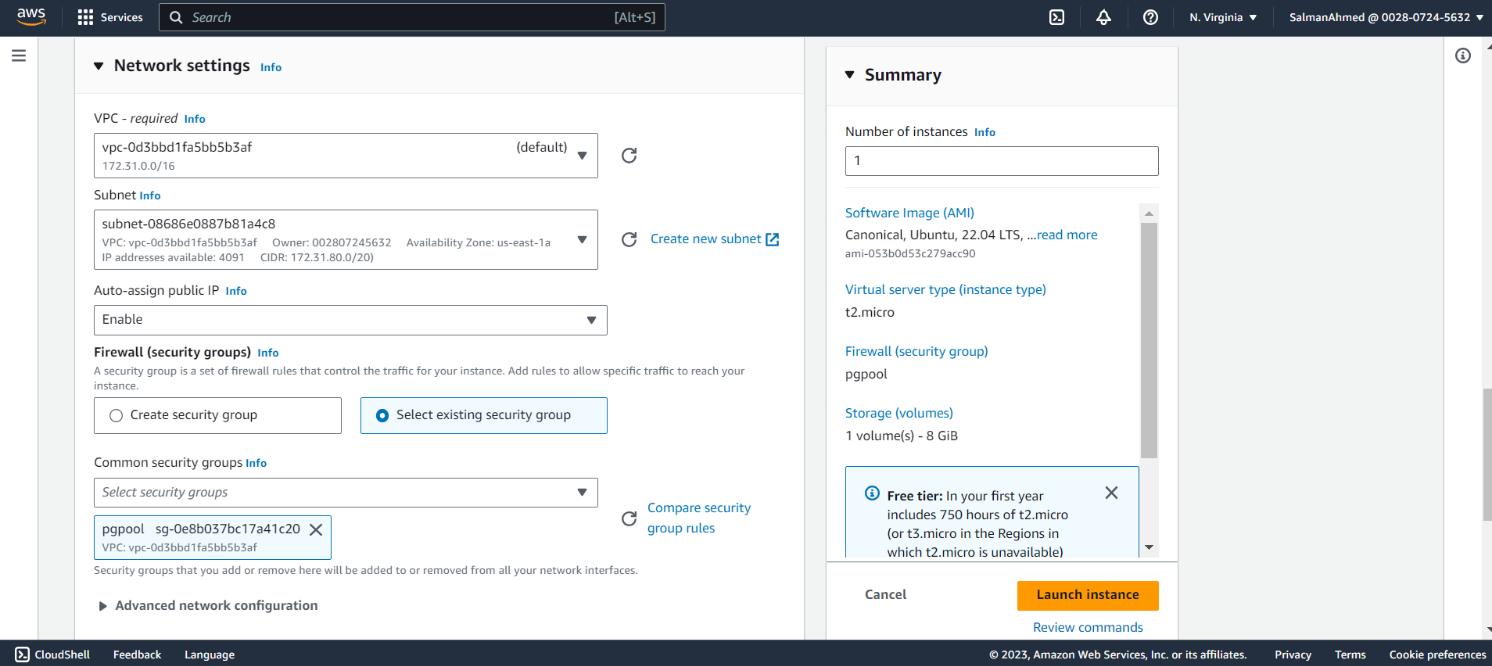
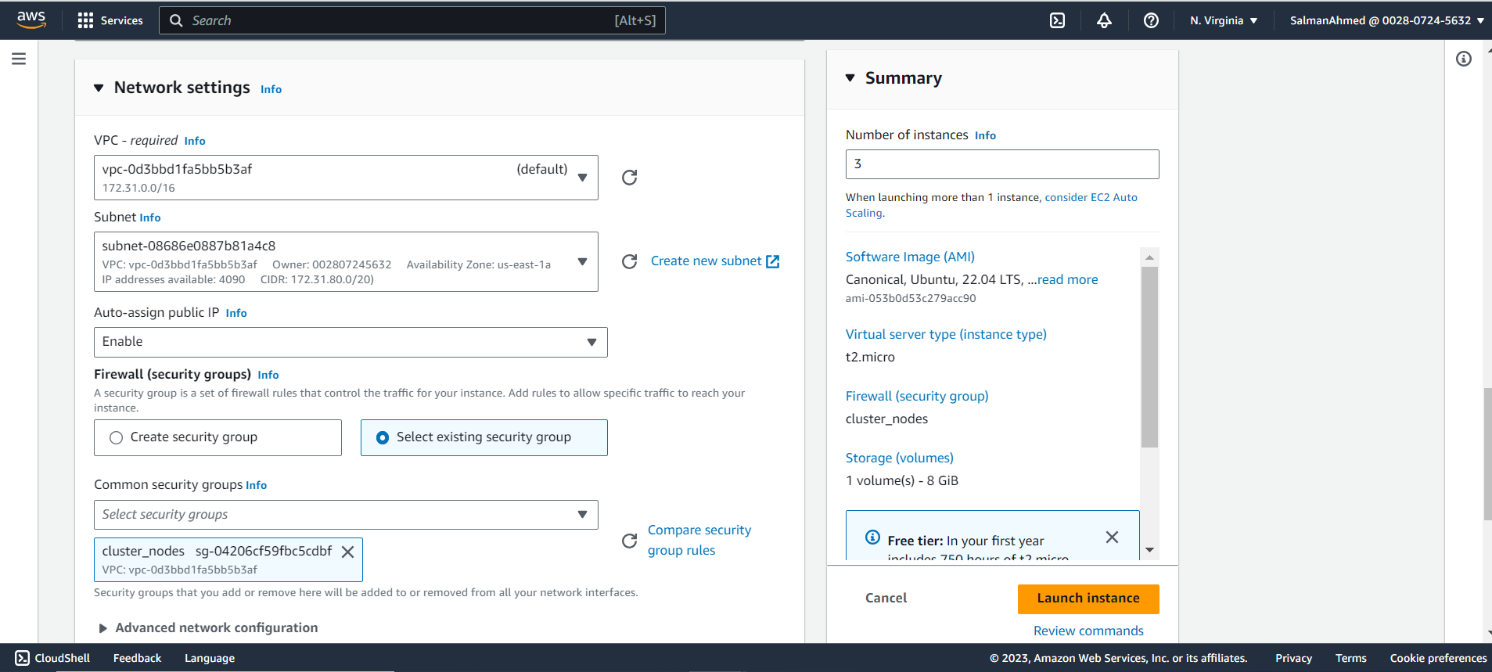
Set Network Settings
Under Network settings, choose a subnet and make sure all Instances are in the same subnet. Also select the security group we created earlier for pgpool node.
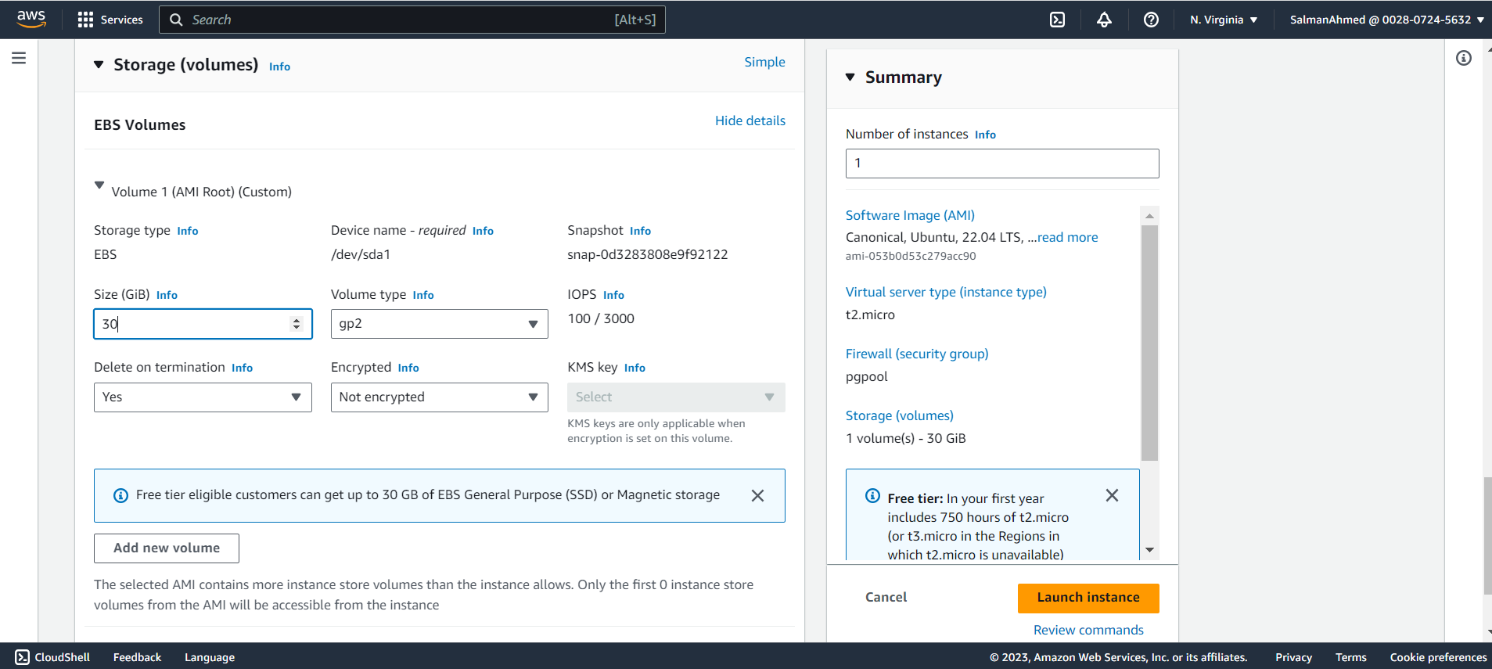
Set EBS Size
Choose the size of the storage as per your requirement, for this blog we’ll be using 30GB. After that click on launch Instance to launch the pgpool node’s instance.
Launch instances for primary and standby nodes
To launch instances for primary and standby nodes, repeat the same steps used to launch instance for pgpool node. Set the number of Instances to 3. Instead of creating a new key pair we can select the pg_cirrus key pair created earlier.
Set Network Settings
Under Network settings select the same subnet used for pgpool node and select the security group created for primary and standby nodes.
For convenience we can give names to the instances.
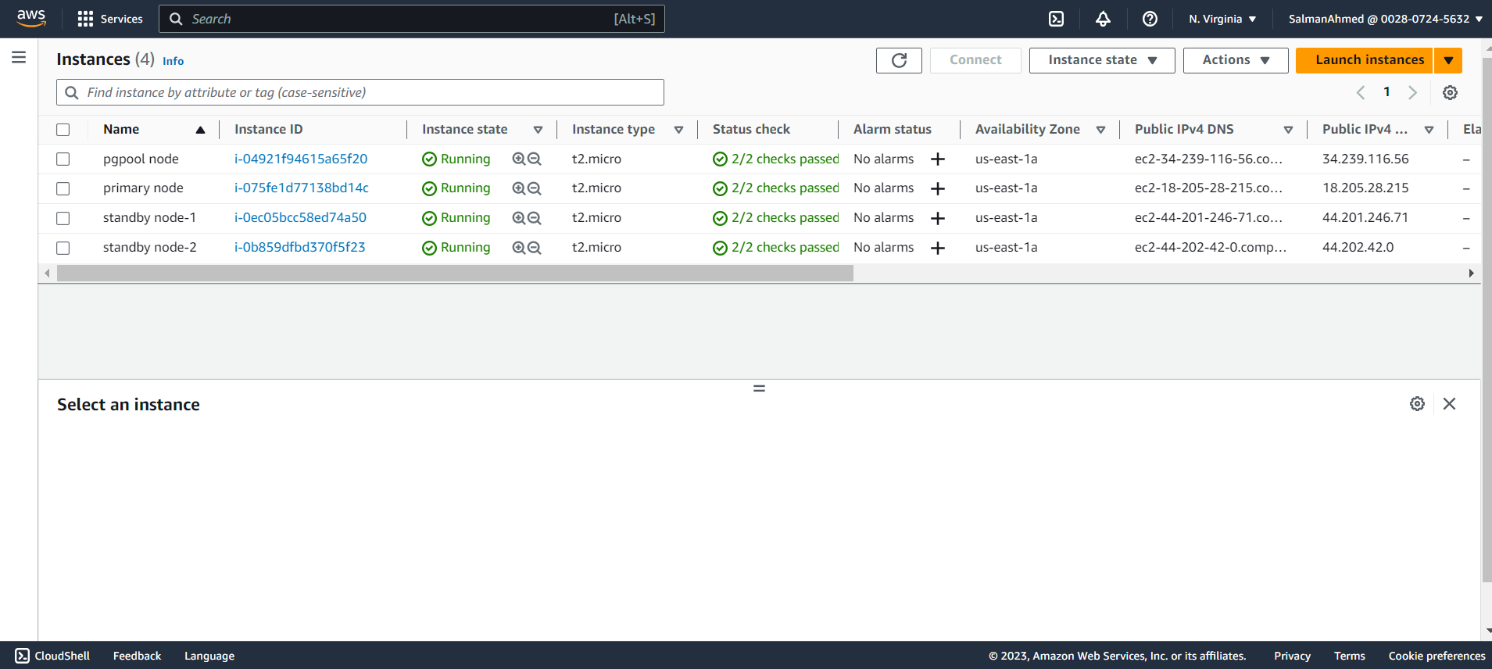
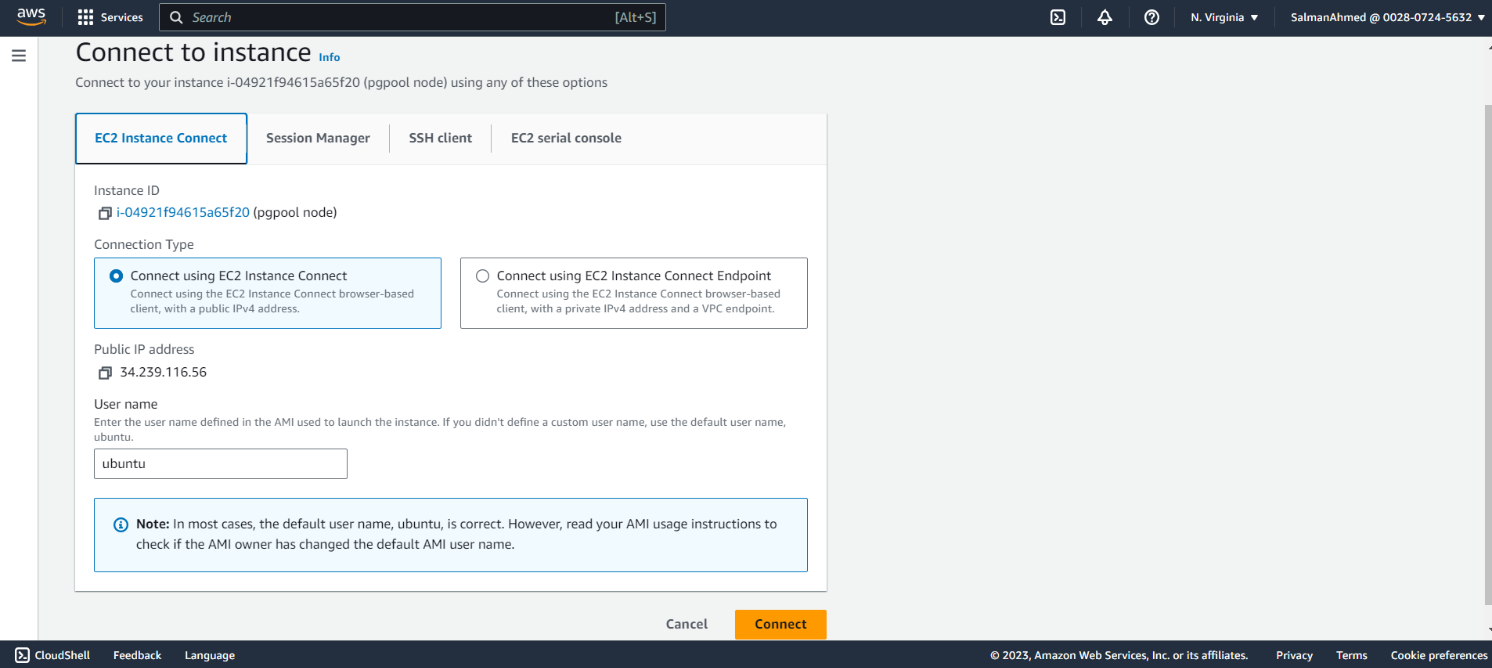
Connect to Amazon EC2 Instances
We can connect to EC2 instances using .pem file downloaded earlier via some SSH-client or we can simply use EC2 Instance Connect. For this blog we will be connecting using EC2 Instance Connect.
To connect using AWS instance connect, select an instance and click connect. You will be redirected to the following page. Select EC2 Instance connect and click on connect. Since there is no other user created at this point we will go ahead with ubuntu user. You will be connected to the EC2 Instance. Connect to all EC2 Instances like this.
Create postgres user
Create postgres user on all instances and grant passwordless sudo privileges to it.
sudo adduser postgresGrant passwordless sudo privileges to postgres user by running following command.
sudo visudoAdd the following string at the end of visudo file.
postgres ALL=(ALL) NOPASSWD:ALLSwitch to postgres user on all Instances.
sudo su - postgresOn pgpool node
Update apt package manager
sudo apt-get update -yInstall Ansible
sudo apt-get install ansible -yCreate ssh key pair
ssh-keygenSave the public key
Save the public key of postgres user you will need it. You can view the public key using following command.
cat .ssh/id_rsa.pubClone pg_cirrus repository
git clone https://github.com/stormatics/pg_cirrusCreate vault.yml file
Create a vault.yml file in pg_cirrus/3-node-cluster.
ansible-vault create vault.ymlWrite the following passwords to vault.yml file.
PSQL_SERVER_PASSWORD: <your_psql_server_password>

REPUSER_PASSWORD: <your_repuser_password>
Create file to store vault password
Create a vault password file to store password of vault.yml file. You will need this when executing pg_cirrus. Write vault password inside this file.
touch <file_name>

chmod 0600 <file_name>
On primary and standby nodes
Update apt package manager
sudo apt-get update -yCreate .ssh directory
mkdir .sshChange permissions
chmod 700 .sshCreate authorized_keys file
touch authorized_keysChange permissions
chmod 600 authorized_keysPaste the public key of postgres user on pgpool node inside authorized_keys file.
Execute pg_cirrus
You should execute pg_cirrus on pgpool node.
Connect to all nodes once
Connect to all nodes from pgpool node once to add all the nodes to the list of known hosts on pgpool node.
ssh postgres@<IP address of your nodes>Go into the directory
cd pg_cirrus/3-node-cluster/Execute pg_cirrus
python3 deploy.pyEnter path to vault password file
You’ll be prompted for vault password file.
Ansible vault password file: ../../passEnter PostgreSQL version
Pg_cirrus will fetch the latest PostgreSQL version. If you want to use latest PostgreSQL version press enter, else enter the version number you want.
Getting latest PostgreSQL stable version ...
Enter PostgreSQL version (Latest: 16):
Enter PostgreSQL port
Enter PostgreSQL port, if you want to use default 5432 port press enter else enter the port you want to use.
Enter the PostgreSQL port number: (Default: 5432):Enter path of data directory
If you want to use default directory press enter or write path for the directory you want to use.
Enter the Data Directory Path: (Default: /home/postgres/stormatics/pg_cirrus/data): Enter subnet address of the cluster
Subnet address for the cluster: 172.31.80.0/20You can get the subnet address by selecting any EC2 instance from the instances page on the EC2 dashboard. Details of the instance will be shown at the bottom of the page. By selecting networking you’ll be able to see a link to subnet under Subnet ID.
Click on this link.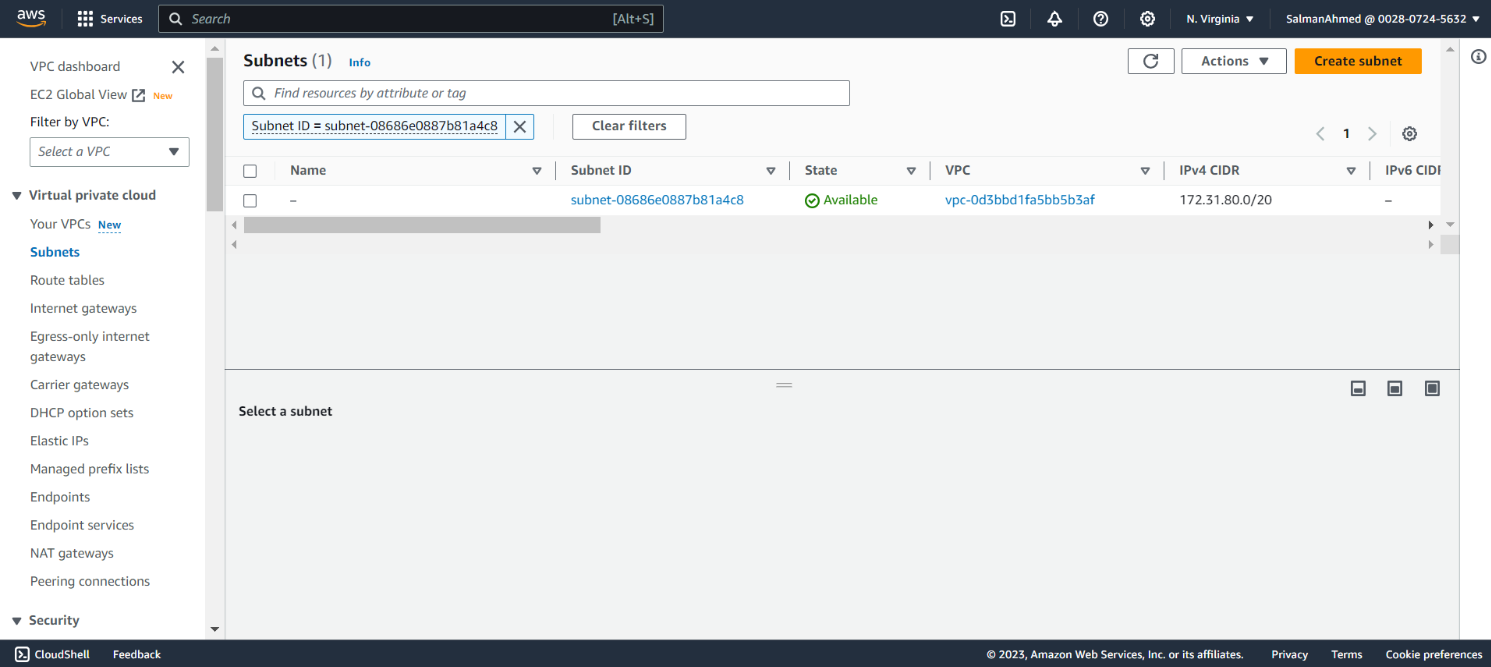
Clicking on this link will take you to subnet page, where under IPv4 CIDR subnet address will be mentioned.
Enter IP addresses of primary, standby and pgpool nodes
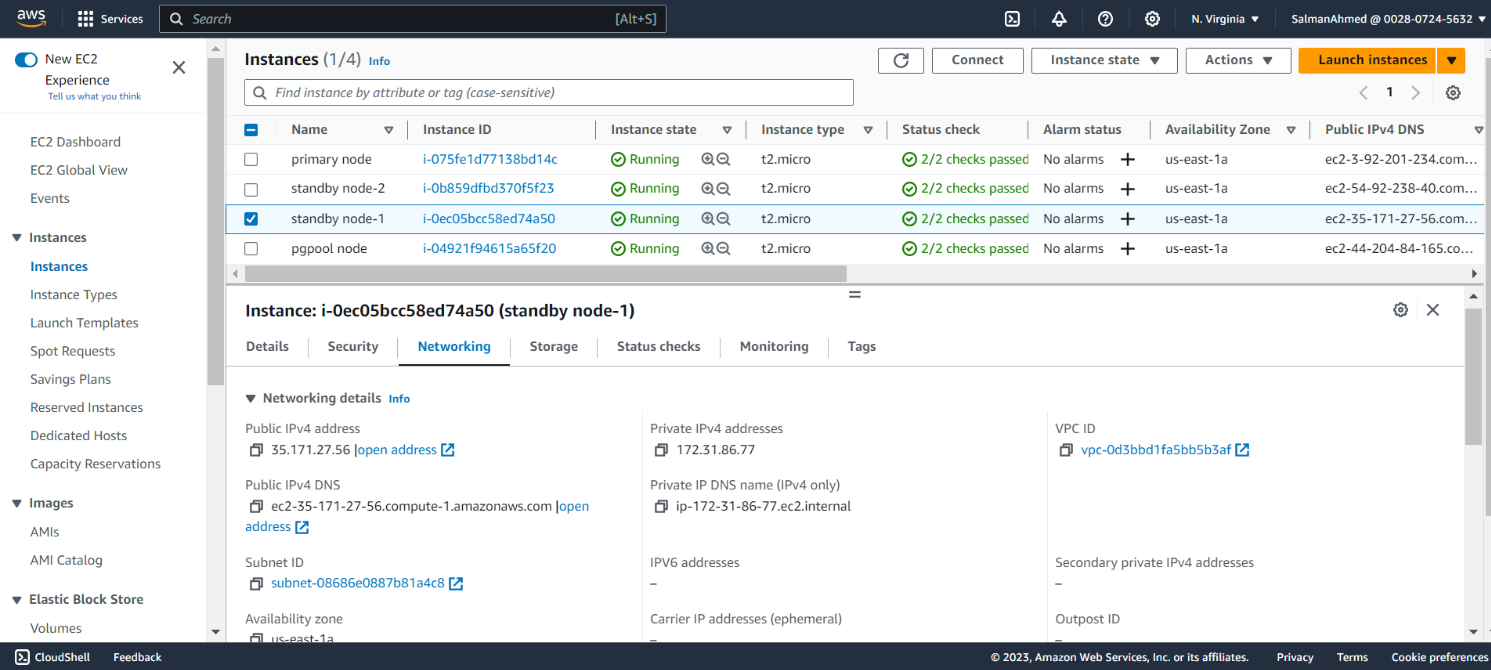
You’ll be asked for IP addresses of primary, standbys and pgpool nodes. You need to enter the private IP addresses here. Private IP and Public IP addresses of the all nodes can be seen by selecting the instance and opening the Networking tab from the details of instances shown under the page. After entering the IP addresses pg_cirrus will start executing.
Primary PostgreSQL Server IP address: 172.31.93.8


Standby 1 IP address: 172.31.86.77

Standby 2 IP address: 172.31.91.179


IP address of this node to setup pgpool: 172.31.94.255

Generating conf.yml ...

Generating inventory file ...
You can view the logs of pgpool on pgpool node by running the following command.
tail -f /var/log/pgpool_logs/<name of log file created in this directory>Connect to 3-Node Cluster
You can connect to this 3-node HA cluster set up by pg_cirrus from anywhere using the following command.
psql -h <public IP of pgpool node> -p 9999 -d postgres -U postgres

Comments (2)
VirgilioPalmi
HI
I followed your guide to use pg_cirrus.
the installation was successful.
I tried to create a DB and fail over the master db, the master is successfully migrated to another standby node.
when the blame node comes back online, nothing happens. Isn’t there an auto attach procedure for the restored node?
Thank you
Virgilio
Semab Tariq
Hi Virgilio
Thank you for utilizing pg_cirrus and reaching out to us!
You’re correct auto-attach feature for the restored node isn’t currently supported and there is no specific timeline for its implementation.
However, if you’re interested in manually attaching your failed node back to the cluster, you can try using the pcp_attach_node command. For example:
pcp_attach_node -w -n NODE_IDI hope this helps! Let us know if you have any further questions or concerns.
Thank you
Semab