
Host-1
On our Host-1(VM) we will perform following actions:
- Install Ansible package via apt-get package manager
- Create ssh passwordless connection to Host-2 where PostgreSQL actually gets installed
- Create Ansible playbook.
- Execute playbook to install PostgreSQL
Note: For better understanding we will refer to Host-1 as Ansible-host.
Host-2
This is our target host where we will install PostgreSQL. This tutorial installs the latest PostgreSQL version which currently is PostgreSQL-15.
Note: For better understanding we will refer to Host-2 as PostgreSQL-host.
Setup Ansible-host
Step 1: Setup SSH passwordless connection between Ansible-host and PostgreSQL-host.
This step is required because Ansible would need passwordless access in order to connect and execute tasks on PostgreSQL-host.
Note: User on PostgreSQL-host must have sudo privileges because PostgreSQL installation requires sudo access. Also if you have already generated these key pairs before, then you may skip this step.
Create a public/private ssh key pair for Ansible-host via the following command.
ssh-keygen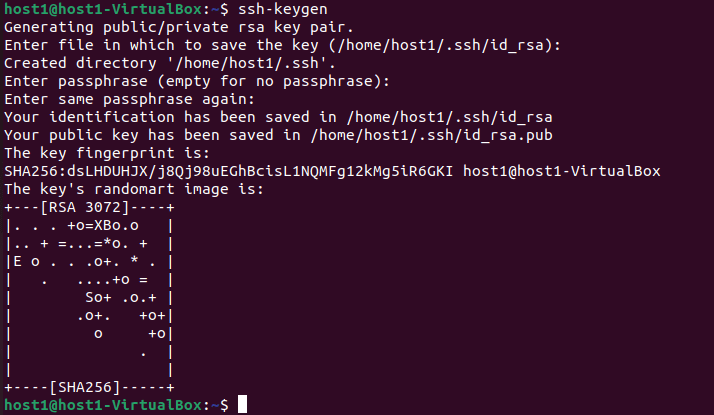
Copy the public key of Ansible-host to PostgreSQL-host.
Note: Running this command for the first time requires user’s password to be entered manually.
ssh-copy-id <username>@<IP_address_of_PostgreSQL-host>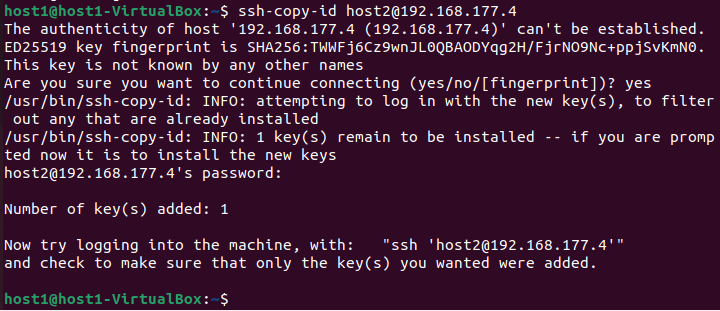
Step 2: Create an Ansible inventory File
An Ansible inventory file is a text file that lists the IP addresses, usernames, passwords etc. for the target machines where Ansible can connect in order to execute playbooks.
touch inventory.ymlAdd the following line to your inventory.yml file and update properties as per your configuration.
_HOST_2 ansible_host=xxx.xxx.xxx.xxx ansible_connection=ssh ansible_user=xxxxxx ansible_become_pass=xxxxxxxx- ansible_host: Add IP address for your PostgreSQL-host
- ansible_user: Add username of your PostgreSQL-host
- ansible_become_pass: Add sudo password for your user on PostgreSQL-host
Step 3: Create an Ansible Playbook
An Ansible playbook is a YAML file that contains a set of instructions that define a series of tasks to be executed on one or more hosts. It is used to automate the configuration and management of servers, applications, and infrastructure. Create a new playbook named postgresql-install.yml.
touch postgresql-install.ymlAdd below code to the playbook.
# Install PostgreSQL on PostgreSQL-host
- name: Install PostgreSQL
  hosts: _HOST_2
  gather_facts: true
  become: true
  tasks:
    - name: Add pgdg repo to sources.list.d
      lineinfile:
        path: /etc/apt/sources.list.d/pgdg.list
        line: "deb http://apt.postgresql.org/pub/repos/apt {{ ansible_distribution_release }}-pgdg main"
        create: true
    - name: Download PostgreSQL key and add it to system keyring
      apt_key:
        url: https://www.postgresql.org/media/keys/ACCC4CF8.asc
        state: present
    - name: Update apt cache
      apt:
        update_cache: yes
    - name: Install PostgreSQL
      apt:
        name: postgresql
        state: present
Code Explanation
- name: Install PostgreSQL
  hosts: _HOST_2
  gather_facts: true
  become: true
  tasks:
The first section of the playbook defines the host where the play will be executed, gathers facts about the host and logs in as superuser.
- name gives a proper name to the play.
- host specifies the host from the inventory file where this play will be executed.
- gather_facts tells Ansible to gather information about the host before executing the tasks
- become specifies that Ansible should run the tasks as superuser.
- tasks tasks/steps to be executed in a play are mentioned in tasks tag.
- name: Add pgdg repo to sources.list.d
  lineinfile:
    path: /etc/apt/sources.list.d/pgdg.list
    line: "deb http://apt.postgresql.org/pub/repos/apt {{ ansible_distribution_release }}-pgdg main"
     create: true
This is the first task in the play, in this task Ansible adds the PGDG repository to the sources.list.d directory on PostgreSQL-host.
- lineinfile adds a line to a file if it does not exist already.
- path specifies the location of the file to modify.
- line adds the content to the file.
- create tells Ansible to create the file if it does not already exist.
- name: Download PostgreSQL key and add it to system keyring
  apt_key:
    url: https://www.postgresql.org/media/keys/ACCC4CF8.asc
    state: present
This task downloads the PostgreSQL key and adds it to the system keyring on PostgreSQL-host
- apt_key module downloads and adds a key to the host’s keyring if it does not exist already.
- url specifies the location of the key to from where it needs to be downloaded.
- state ensures that the key is present on the host.
- name: Update apt cache
  apt:
    update_cache: yes
This task updates the apt cache on PostgreSQL-host.
- apt updates the apt cache if it is out of date.
- update_cache specifies that the cache should be updated.
- name: Install PostgreSQL
  apt:
    name: postgresql
    state: present
This is the last task in the play which installs a package.
- apt is a package manager for Ubuntu
- name specifies the name of the package to be installed. in our case we are installing latest version for PostgreSQL
- state ensures that the package is present on the server.
Note: If you want to install a particular PostgreSQL version, then you can set the version number as postgresql-<version_number> e.g. postgresql-14.
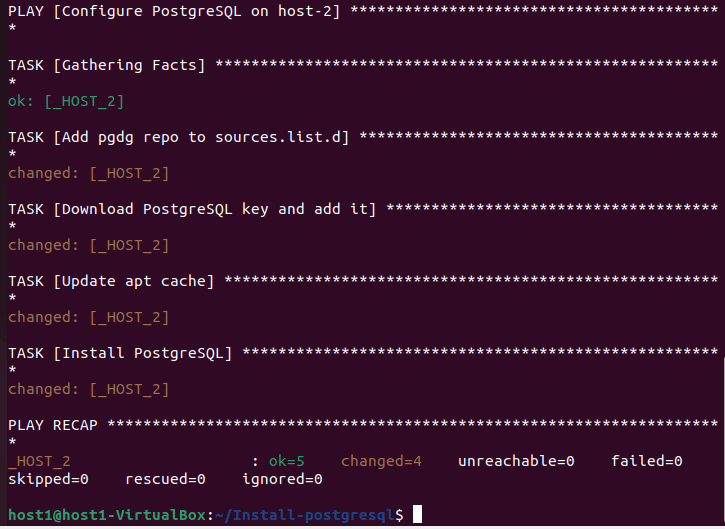
Step 4: Run Ansible playbook
Now once all the pre requirements are satisfied we are ready to execute our playbook.
ansible-playbook -i inventory.yml postgresql-install.yml![]()
- ansible-playbook this is a utility to run Ansible playbook.
- -i switch is to specify inventory file path.
- And finally specify the main ansible playbook file
Verify the PostgreSQL installation
Step 1: Switch to PostgreSQL-host using ssh
ssh <username>@<IP_address_of_PostgreSQL-host> 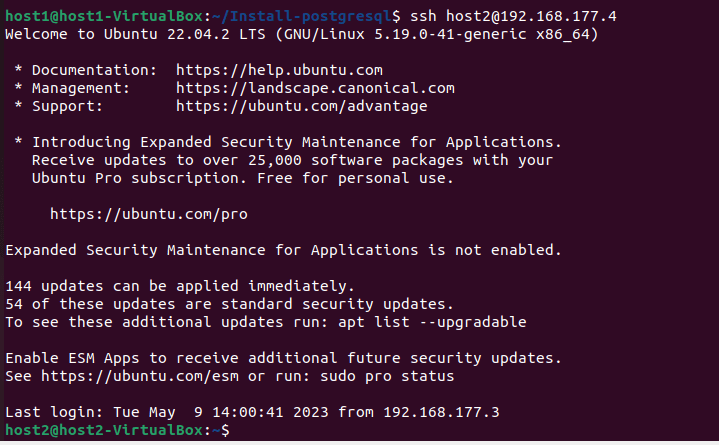
Step 2: Switch to user postgres
When you install PostgreSQL on your system, a user named postgres gets created by default, hence we switch to this user to connect to the database.
sudo su postgres
Step 3: Connect to PostgreSQL via psql
psql -d postgres -p 5432 -U postgres
This command connects to a PostgreSQL database using the psql command-line utility. Once connected, you can begin running queries.
- –d switch specifies the database name PostgreSQL default database is postgres
- -p switch specifies port number, PostgreSQL default port is 5432
- -U switch specifies the username PostgreSQL default username is postgres
Step 4: Run Query to check version
SELECT version();![]()
You will get this output

Key takeaways
Using ansible we simplify the process of installing PostgreSQL on remote servers by automating the installation process. Installing PostgreSQL using Ansible can save time and ensure consistency across your infrastructure. With the steps outlined in this blog post, you can confidently install PostgreSQL using Ansible and streamline your PostgreSQL installation process. However, it is important to note that proper planning, implementation, and monitoring are crucial for successful automation projects. With the right approach, Ansible can be a powerful tool for managing distributed systems and simplifying complex tasks.
